Tuesday, April 11, 2023

April Lori Whitlock Creative Team Blog Hop


Hello Everyone and happy April:
Welcome to the Lori Whitlock Creative Team blog hop.  You should have come here from Lori Whitlock's blog and will next be going to Brandie Harding Adams' blog.  I made this fabulous 5X7 Happy Spring Pop Up Card that Lori designed (SVG, Silhouette). I used one of Lori's brand new Echo Park Paper collections called Life is Beautiful.  This collection is perfect for your spring paper crafting needs.
Thanks for looking and have a great day,
Hugs,


Thursday, April 6, 2023

Box Card Easter Bunny Carrot Card Tutorial


Hi Everyone:

Anita here with a tutorial on assembling Lori's Box Card Easter Bunny Carrot card (SVGSilhouette).  My grandson loves everything to do with cars and trucks and I thought that he would love this card for Easter.  Lori has so many fabulous designs, be sure to check them out for your spring card needs.

Here are the pieces for this fun, interactive card.

Glue the pieces that go together and set them aside for now.

Here is the box glued together and the bunny glued inside it.  When making these cards I always fold them closed to make sure that things are lining up like I want them to.

Here is a top view where you can see where the bunny center piece was placed within the car body.

Here is the back of the card.  I love the way Lori has the sentiment and room for me to write my grandson a message.

Here is the card folded flat and ready for mailing.

That's it for me today.  I hope that you have  a wonderful spring weekend this weekend.  Happy Easter for those that celebrate it.

Hugs,


Thursday, March 30, 2023

Carrot Favor Box Tutorial

 Anita here with a tutorial on Lori's Carrot Favor Box.  I made this for my niece who is away at college.  I filled the boxes with jelly beans and M&M's.  You can find the file here (SVGSilhouette).
Here are the pieces that come with this file:


This shows the items folded on their score lines.

I decided to use a paper crimper to crimp my grass the give it some more fluff in my crate.

This shows the grass in the crate.

This last photo shows all of the items separately before I put them together into the crate.


Such a fun and easy project and I now that she will enjoy opening her carrots up to see what treats are inside for me.  Have a great day.
Hugs,

Tuesday, March 14, 2023

Box Card St. Patrick's Day Horseshoe March Blog Hop


Anita here for the March Lori Whitlock Creative Team blog hop.  You should have come here from  Traci Matthew Penrod's blog and will next be going to Brandie Harding Adams' blog.  I made this adorable card which is called Box Card St. Patrick's Day Horseshoe (SVG, Silhouette).  I used some of Lori's Echo Park Paper collections including Day in the Life No. 2, Pets and Our Little Princess.  This card folds flat for mailing which is great.  


Hugs,


Monday, March 6, 2023

Bobble Card Pot of Gold


Anita here with a fun St. Patrick's Day card which is called Bobble Card Pot of Gold (SVGSilhouette).  I used Mini Action Wobbles Springs to pop up the pot of gold and it wiggles when you pic it up or shake it.  Lori has a tutorial on her site for this type of card as well as links to get the wobbles.  I used some of her Echo Park paper collections including:  Day in the Life No. 2, Pets and Our Little Princess. Thanks for looking and have a great day.


Hugs,

Tuesday, February 14, 2023

February Lori Whitlock Creative Team Blog Hop


Welcome to the February Lori Whitlock Creative Team Blog Hop.  Happy Valentine's Day! You should have come here from Traci Matthews Penrod's blog and will next be going to Brandie Harding Adams' blog.  I decided to make Lori's Valentine Card Crayon Holder Dog (SVG, Silhouette), Frog (SVGSilhouette).  These are a print and cut file and so easy to put together.  I would suggest a heavier cardstock for the base or gluing together two layers of cardstock so that your crayons stay where they are supposed to.  Be sure to check out all of Lori's Print and Cut Valentines, so much cuter than what you can find in the store.


Hugs,


Thursday, February 9, 2023

Adhering a Vinyl SVG to a Travel Mug


Happy Thursday Everyone:

Anita here with a tutorial on the application of vinyl to a travel mug.  I wanted to make this for one of my friend's for Valentine's Day as one of her true loves is coffee.  I used Lori's SVG called I Only Need Coffee on Days with "Y" (SVGSilhouette).  I used some Cricut silver matte vinyl for my project.  I selected matte vinyl for my cutting surface.  You do not need to mirror the design when using regular vinyl on a project.

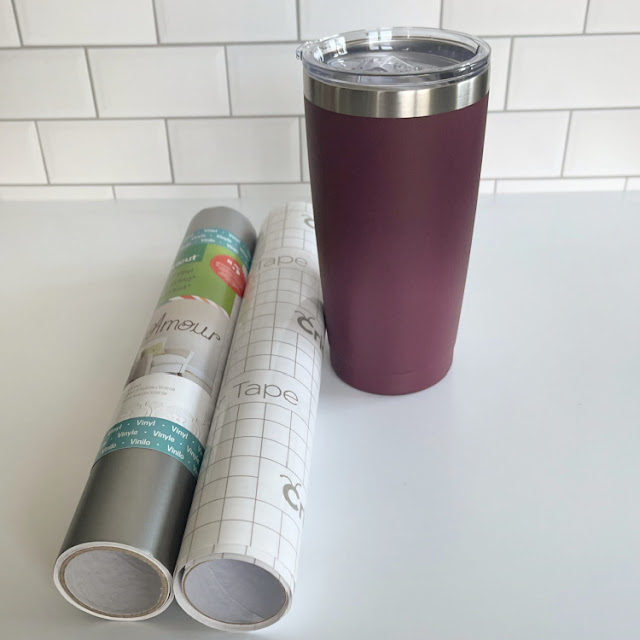
Here are the materials that I used for my project.  You will want to pick up some transfer tape if you don't have any as it makes these vinyl projects so much easier.

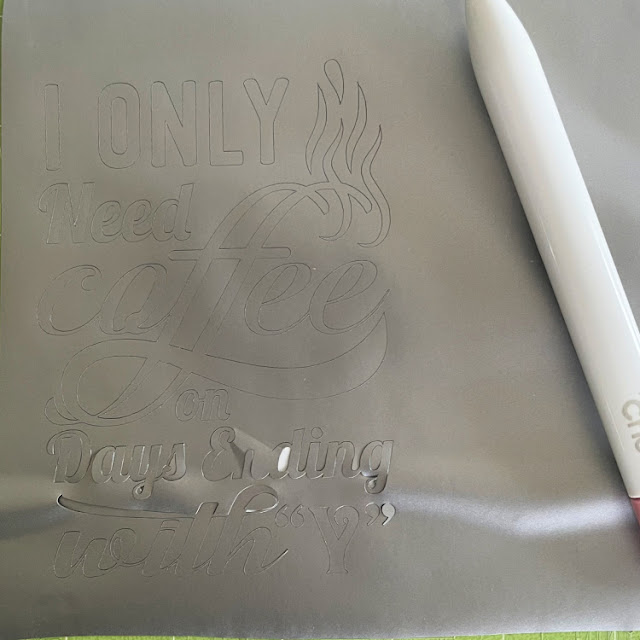
Here is the design cut out and that is my weeding tool from Cricut which is next to the design.  It has a hook on the end which makes fishing out those tiny little pieces so easy.  You can use a pin and I have used a seam ripper in the past too.  You are going to want to remove all of the pieces of design that you don't need to be there.  I started in one corner and slowly peeled the excess away from my design.  If there are fine elements to your design you might need to hold onto the design with one hand as you pull the excess away so that your design doesn't tear.

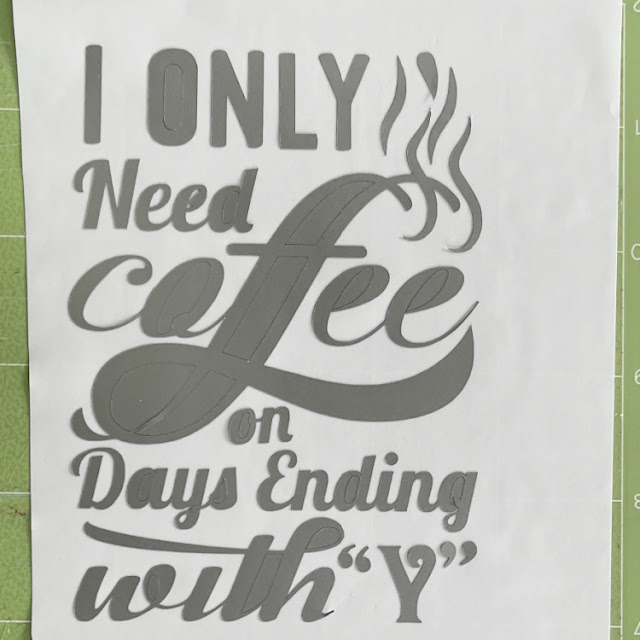
Here is what my design looked like after I peeled away all of the excess piece which came off in one piece,  Next, I needed to go in and grab those extra little bits to help define my design more.  I used my weeding tool for this.  You can use a pin as well.

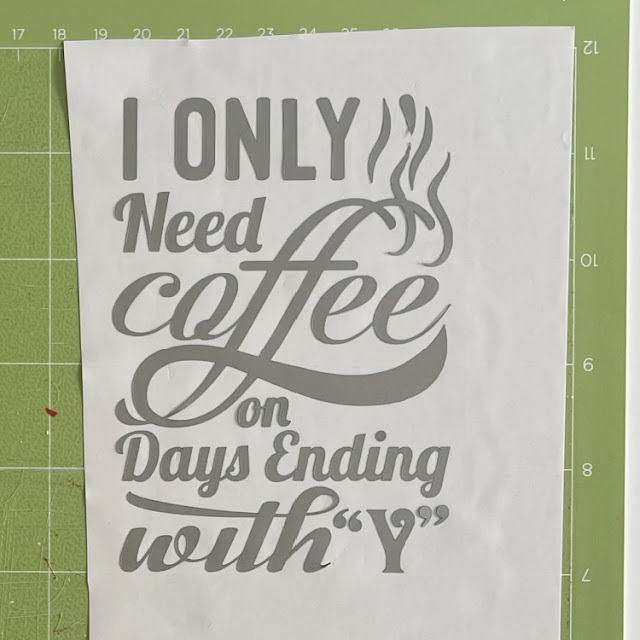
My design is now all weeded and ready for the transfer tape to be applied directly on top of the design.  I cut a piece of transfer tape a little larger 1/2" or so around your design.  Then I peeled off the white piece on the transfer paper leaving the sticky side exposed and then stuck that down on top of my design.  I leave my design on my mat through these steps as it is easier to work with.  At this point you need to burnish the transfer tape onto your design.  Essentially you want the tape to pick up just the vinyl from the backing paper so that you can adhere it directly to your mug and see exactly where it is going to go.  I used my Cricut scraper that I bought but you can certainly use a popsicle stick for this step.  Check to see if you have been successful in getting the vinyl to adhere to the transfer tape.  If not, continue to burnish until it all comes off the backing paper.

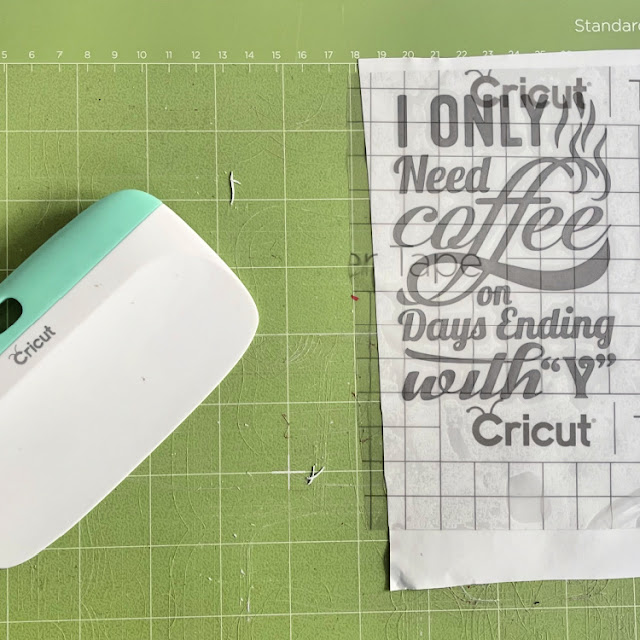
This photo shows the transfer tape on and the tool that I used to burnish the vinyl onto the transfer tape. And my well love mat, lol.

Lastly, I placed my transfer tape onto the mug.  I started carefully at one edge laying it on and let it gently fall where it wanted to given that the cup is rounded.  I then used my fingers to smooth out the transfer tape.  One I was happy with the placement, it was time to again burnish the design to get it to adhere to the cup.  It came out great and I'm sure that she will love it.

Thanks for looking and have a great day.

Hugs,

Anita