Showing posts with label Card. Show all posts

Thursday, April 6, 2023

Box Card Easter Bunny Carrot Card Tutorial


Hi Everyone:

Anita here with a tutorial on assembling Lori's Box Card Easter Bunny Carrot card (SVGSilhouette).  My grandson loves everything to do with cars and trucks and I thought that he would love this card for Easter.  Lori has so many fabulous designs, be sure to check them out for your spring card needs.

Here are the pieces for this fun, interactive card.

Glue the pieces that go together and set them aside for now.

Here is the box glued together and the bunny glued inside it.  When making these cards I always fold them closed to make sure that things are lining up like I want them to.

Here is a top view where you can see where the bunny center piece was placed within the car body.

Here is the back of the card.  I love the way Lori has the sentiment and room for me to write my grandson a message.

Here is the card folded flat and ready for mailing.

That's it for me today.  I hope that you have  a wonderful spring weekend this weekend.  Happy Easter for those that celebrate it.

Hugs,


Tuesday, July 12, 2022

July Lori Whitlock Creative Team Blog Hop

 Happy July:

Hope that your summer is off to a great start.  It's time for the July Creative Team blog hop from Lori Whitlock.  You should have come here from Traci Matthews Penrod's blog and will next be going to    Brandie Harding Adam's blog.  I made Lori's Pop Up Box Card House (SVG, Silhouette) and used one of Lori's Echo Park Paper collections called Fun on the Farm.  I changed the sentiment to say congrats on your new home.


Hugs,


Tuesday, May 10, 2022

May Lori Whitlock Creative Team Blog Hop


It's time already for the Lori Whitlock May Creative Team blog hop.  I made Lori's Impossible Card Spring Flowers and you can find the files here (SVG, Silhouette).  Be sure to check out all the wonderful spring season celebration cards that Lori has in her SVG store.  She also has a tutorial on her blog for assembling these cards which you can find here.  
I used some of Lori's new Echo Park Paper collections called Our Little Princess.   It is so soft and pretty and so perfect for a springy card. You should have come here from Traci Matthews Penrod's blog and will next be going to Brandie Harding Adams' blog.


Hugs,

Wednesday, January 19, 2022

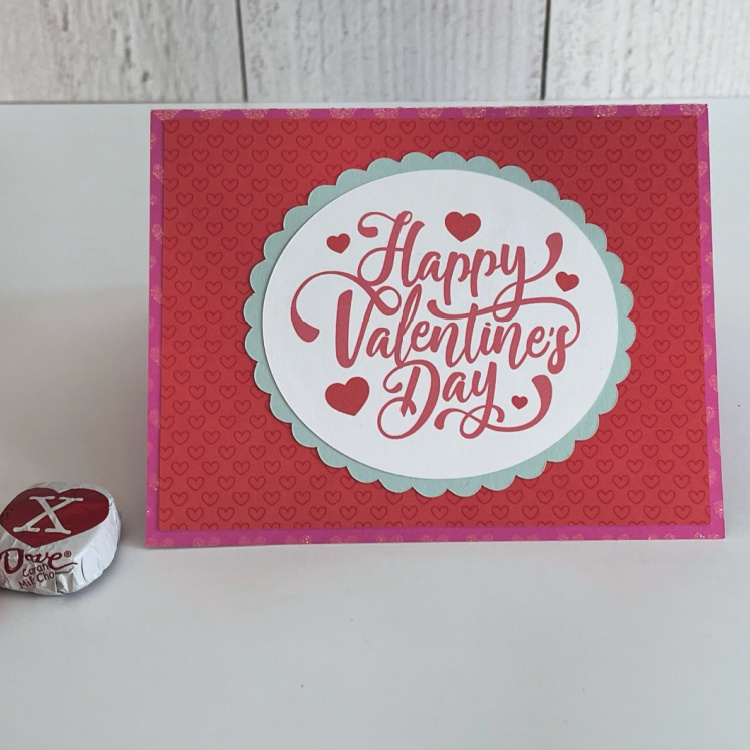
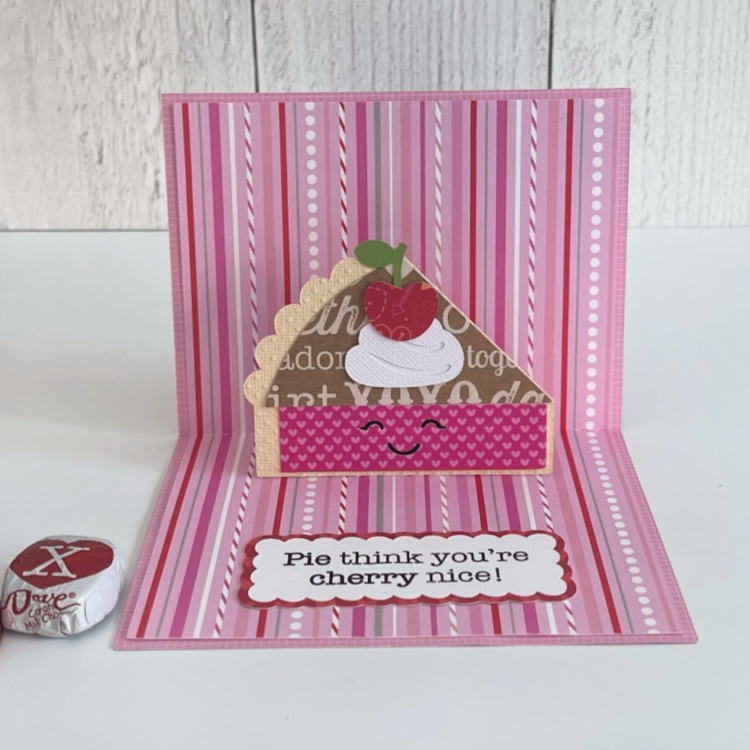
Cherry Pie Valentine Card


Hi Everyone:

Anita here with an adorable Valentine that I made for my daughter-in-law who loves pie.  It is called Pop Up Card Valentine Pie (SVG, Silhouette).  Lori also has a tutorial which you can find here on how to put together a box card.  I love how easily they go together.  Next to Christmas, Valentine's Day is my favorite holiday.  I love these interactive cards and that you can fold them flat and easily slip them into an envelope for mailing.

Here is a photo of the card opened.

Thanks for looking and have a great day.

Hugs,

Wednesday, September 8, 2021

Off To College Stationery Set

Hi Everyone:

Happy Fall.  Hard to believe where the summer went.  I wanted to put together an off to college stationery set for my niece.  I'm going to send her first care package with treats and this stationery set in it.  These cards which are linked below, the Ornate Pull Out Cards 1-9 are so pretty and so easy to put together.  The Stationery Box Big Scallops is linked below as well and is great to package up these beautiful cards.  I used Lori's Echo Park Paper collection called A Slice of Summer.  Thanks for looking and have a great day.

Stationery Box Big Scallops (LW store, Silhouette)

Ornate Pull Out Card 1 (LW store, Silhouette)

Ornate Pull Out Card 2 (LW store, Silhouette)

Ornate Pull Out Card 3 (LW store, Silhouette)

Ornate Pull Out Card 4 (LW store, Silhouette)

Ornate Pull Out Card 5 (LW store, Silhouette)

Ornate Pull Out Card 6 (LW store, Silhouette)

Ornate Pull Out Card 7 (LW store, Silhouette)

Ornate Pull Out Card 8 (LW store, Silhouette)

Ornate Pull Out Card 9 (LW store, Silhouette)

Hugs,

Monday, August 23, 2021

Rectangle Pop Up Card Flower Box Stand


Anita here with one of Lori's new gorgeous Rectangle Pop Up Card Flower Stand.  You can find that file here in Lori's store and here in the Silhouette store.  Lori also has a tutorial which tells you how to put together her rectangle pop up card and you can find that here.  I made this for a sweet young woman who is going after her dreams by starting a new job in a different field.  I used several of Lori's Echo Park Paper collections, including My Favorite Christmas, A Perfect Autumn, Back to School, Celebrate Spring, Easter Wishes and Celebrate Easter.  Be sure to check out all of Lori's new pop up stand cards, they are so cute and very easy to put together.

Hugs,


Tuesday, June 8, 2021

June Lori Whitlock Creative Team Blog Hop


Hi Everyone:
Anita here with my card for the Lori Whitlock June Creative Team blog hop.  I made this for a friend who recently had some surgery.  You should have come here from Kathy Skou's blog and will next be going to Brandie Harding Adams' blog.  I made the A 2 Card Sunshine Get Well file which you can find here in Lori's store and here in the Silhouette Design store.  It will surely bring a smile to someone who is feeling under the weather.  


Hugs,

Tuesday, April 13, 2021

April Lori Whitlock Creative Team Blog Hop


Hi Everyone:
Welcome to the Lori Whitlock Creative Team April blog hop.  You should have come here from Kathy Skou's blog and will next be going to Aimee Kidd's blog.  If you did not get here in that way, you can start at the beginning of the hop at Lori's blog.  I made Lori's Get Well Card Teacup for a friend.  You can find that file here in her store and here in the Silhouette Design store.  Be sure to hop along to see what everyone has created.


Hugs,

Tuesday, March 9, 2021

March Lori Whitlock Creative Team Blog Hop


Happy March Everyone:
Welcome to the Lori Whitlock Creative Team blog hop for March.  I made this adorable Decagon Pop Up Card St. Patrick Gnome, which you can find the file for here in Lori's store and here in the Silhouette store.  I used some fun Doodlebug papers from my stash.  I made this for my sweet grandson and will be sending it off to his daycare center for the monthly mail day that they have for the kids.  
You should have come here from Traci Matthews Penrod's blog and will next be going to Brandie Harding Adams' blog.


Here is a photo of the card folded flat for mailing. 


That's it for me today.  Don't you just love that free unicorn file?  Have a great week and enjoy the rest of the hop.
Hugs,

Tuesday, January 12, 2021

Lori Whitlock Creative Team January Blog Hop


Hi Everyone:
Happy January.  Welcome to the January Creative Team Blog Hop.  I made the Box Card Vespa for my niece for her birthday.  You can find the Vespa file here in Lori's store and here in the Silhouette Design store.  I used some fun Doodlebug Design prints for this project. You should have come here from Lori Whitlock's blog and will next be going to Brandie Harding Adams' blog.  


Hugs,

Thursday, November 12, 2020

Box Card Christmas Sleigh


Hi Everyone:

Anita here with a fun and easy tutorial to make this adorable Box Card Christmas Sleigh.  You can find the SVG file for this card here in Lori's store and  here in the Silhouette Design store.  I used Lori's Echo Park line called Lumberjack Christmas.

Here are the pieces that you will cut out to make your box card.  Just a note, if you are using two sided paper, then you are going to want to reverse the design of the sleigh part that is in the top right corner.  It goes inside your sleigh on the back piece and you will want it to be the color of your sleigh.

Here is a photo of the pieces glued together and ready to be put together and into the box which we will create below.

You will fold the score lines on the longer piece of the sleigh which is the front piece.  There is another rectangle that has score lines on it.  Bend those score lines to prepare it to be glued into the front of your sleigh.  I started with the back piece first and glued the tab to the back of the sleigh.  Then is put glue on both of the tabs for the front and glued that into place.  You can see how it looks once the sleigh is glued together.

I then added in piece once which has Santa on it.  I put it about 1/4" from the front of the sleigh.  This is really about personal preference and how you want it to look.  I then folded the tabs for part two, with the presents and glued that into place.

You are done and have a lovely card which folds flat for mailing.  Thanks for looking and have a great day.

Hugs,