Showing posts with label birthday. Show all posts

Wednesday, March 2, 2022

Pop Up Box Card Birthday Age 60


Hello:

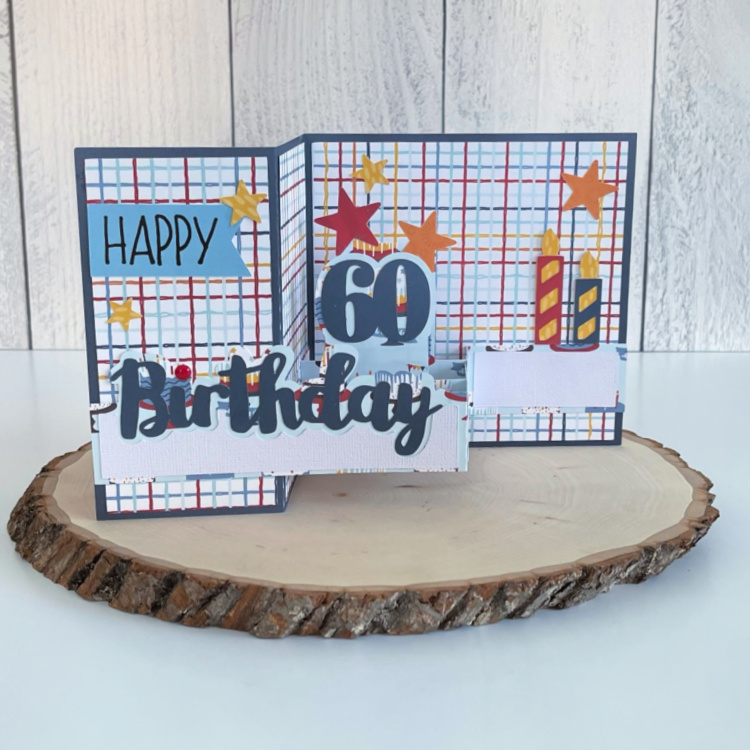
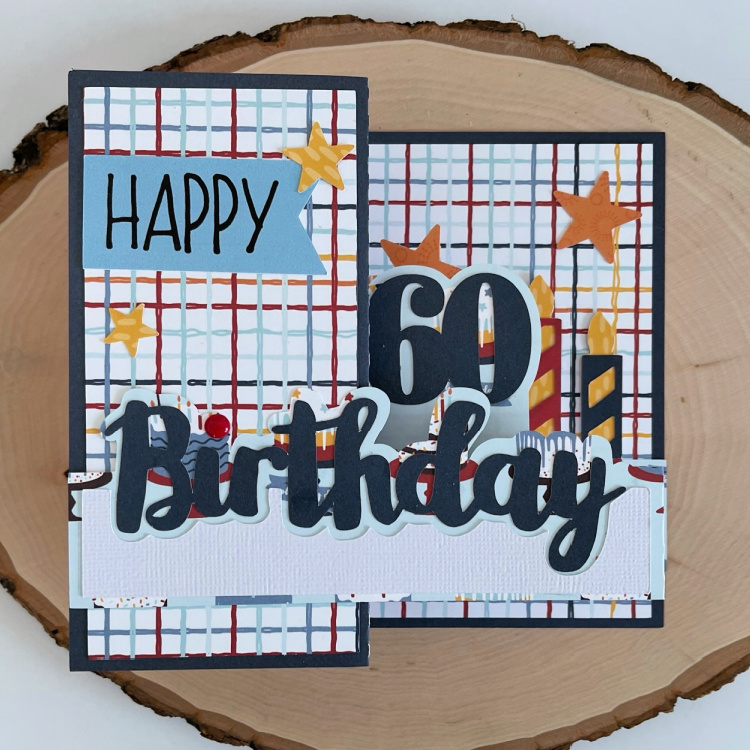
Anita here with a fun card that I made for a good friend who just turned 60.  This card is so easy to put together and really makes a statement.  It is called Pop Up Box Card Birthday and you can find it here (SVG, Silhouette) as well as here you can find Lori's tutorial for putting together her pop up box cards.  I used one of Lori's new Echo Park Paper collections called Birthday Boy.  She has many different ages to choose from for the wonderful card.  Below is the card folded flat for mailing. 

Have a great day.

Hugs, 

Tuesday, January 12, 2021

Lori Whitlock Creative Team January Blog Hop


Hi Everyone:
Happy January.  Welcome to the January Creative Team Blog Hop.  I made the Box Card Vespa for my niece for her birthday.  You can find the Vespa file here in Lori's store and here in the Silhouette Design store.  I used some fun Doodlebug Design prints for this project. You should have come here from Lori Whitlock's blog and will next be going to Brandie Harding Adams' blog.  


Hugs,

Tuesday, May 12, 2020

May Lori Whitlock Blog Hop

 
Hi Everyone:

Happy May.  Welcome to the Lori Whitlock Creative Team May Blog Hop.  You should have come here from Kathy Skou's blog and will next be going to  Brandie Harding Adams' blog.  If you didn't arrive here in that way, you can always start at the beginning at Lori's blog, you don't want to miss all the pretty things my team mates have made.  I made Lori's new Double Slider Card Birthday Dog which you can find here in her store and here in the Silhouette Design store.  Lori also has a wonderful tutorial on her blog and on You Tube which you can find here.  I used some Doodlebug Petite Prints for this card.  It is for a sweet woman who has a black and white dog.

These photos show the card closed, ready to be mailed off; the second photo shows it with the pull tab extended and the third shows the inside of the card.


That's it for me today.  Thanks for looking and have a great day.
Hugs,

Thursday, March 29, 2018

Flat Front Shutter Card Birthday


Hello Everyone:
Anita here with a fun and easy tutorial for the Flat Front Shutter Card Birthday which you can find here in Lori's store and here in the Silhouette Design Store.  I used one of Lori's brand new Echo Park lines called Sweet Baby Girl.  It was perfect for a soft and feminine card.
Here are all the pieces.  There are several that are small so remember to keep track of them.
I put together the pieces of the card and am glued everything down before I started folding.  It is much easier to work on the folds that way.
Your first step is to crease the fold to the right of the cake and you will be folding it so it creates a valley when you look from the top.
I held the card in my left hand and pressed gently down on the middle score line with my left hand and held it in place while I used my right hand to score it across the fold.  You will be creating a valley fold here.  As you can see the folds on the top and bottom of that section just naturally go to the way that they are supposed to be creating hill folds.
I folded up the right side of the card and used a bone folder to gently strengthen my score marks.  On the smaller pieces you will be scoring through two of the folds.
Here is a view from the top so you can see exactly what it should look like.
Lastly, here is the closed card and as you can see it lays flat and can be popped in an A2 envelope to be sent off to someone sweet.
Thanks for looking and be sure to check out Lori's shop for more great cards of this type.
Hugs,

Tuesday, June 13, 2017

June Lori Whitlock Blog Hop


Happy June Everyone:

Welcome to my blog and Lori Whitlock's wonderful Creative Team blog hop.  You should have come here via Kathy's blog.  If you didn't come here that way you can start at the beginning on Lori's blog.  For this month's project I needed to make a birthday card for one of my nephews.  I used Lori's A2 X Card Sailboat which you can find here in Lori's Store and here in the Silhouette Store.  I used Lori's Echo Park Collection called Go See Explore as my nephew loves boats and being on the water and this was perfect.  This card folds flat and is so easy to put together.  Lori has several different themed cards of this style that you just have to check out.  Next you will be going to Lezlye's blog.


That's it for me today.  Happy hopping and don't forget to enter to win a gift certificate to Lori's wonderful store.
Hugs,

Friday, July 24, 2015

CardMaker Birthday


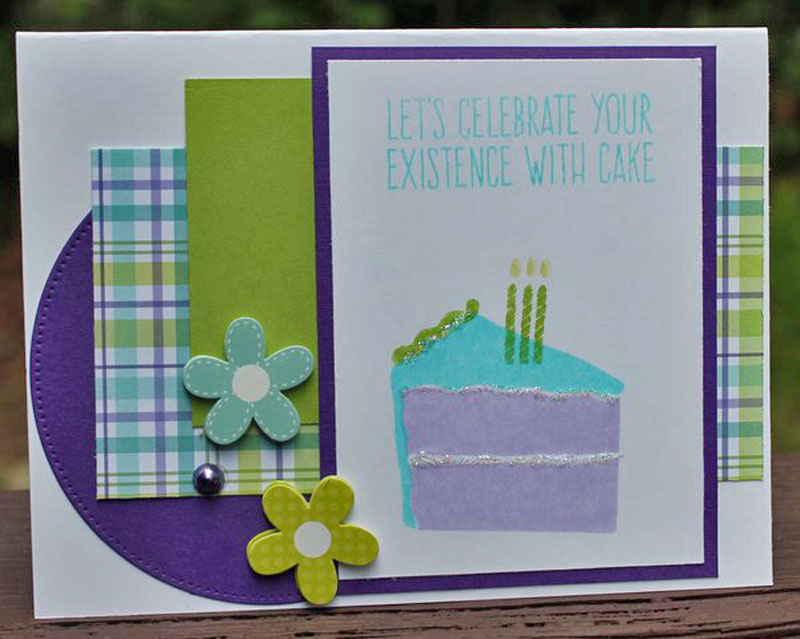
Happy Friday everyone.  I am so thrilled to be back guest designing for my favorite magazine and blog, CardMaker.  I love browsing on Pinterest and probably spend way too much time doing it.  I fell in love with this color palette and knew that they would match the plaid paper which I had just bought from My Favorite Things. 
I used some wonderful inks from My Favorite Things which match the papers beautifully and finished off my card with some sparkly Stickles.

 Project Materials:  Stampin' Up and Gina K. Cardstock, My Favorite Things Plaid Patterns, My Favorite ThingsPierced Circle Stax Die, Doodlebug Doodlepops and Jewel, Stickles, My Favorite Things Ink Banana Split, Sour Apple, Blu Raspberry, Grapesicle, My Favorite Things Piece of Cake Stamp Set  
Hugs,


Monday, June 15, 2015

Strawberry Birthday Wishes

 I love summer and especially strawberries.  I found these adorable cut files in the Silhouette Store and made this gift set.  The little box would hold a gift card and the strawberry box could be filled with some small chocolates.
Here is the card which will fit perfectly in a standard size envelope.  I tied some yummy The Twinery twine around the stem and I used four different colors which I love to do on projects.  Mixing and matching is so much fun.
How stinkin' cute is this little box from Lori Whitlock.  This is what caught my eye and led me to creating this gift set.  I tied some twine around the handle of the box to match the card.


Finally, here are some photos of my luscious strawberry.  I used some fabric stiffener called Stiffy to make a twisted stem curl for my strawberry.  I painted on the Stiffy, which is really like very thin white glue and then wrapped it around a chop stick and let is dry that way overnight.  It gives you a beautiful, stiffened twine embellishment.  I hope that you have a chance to try stiffening some of your twine.
Project Materials:
Bazzill Cardstock, Silhouette cut files - 3d Strawberry Favor Box by Lori Whitlock #76158, Strawberry Shape Card by Alaa' K #10125, Chocolate Covered Strawberry Box by Megan Hard Designs #327280, The Twinery Twine  

Be sure to check out the store for these and many other wonderful colors including two of our new releases.
Hugs,
Anita