.jpg)
Tuesday, November 8, 2022
November Lori Whitlock Creative Team Blog Hop
.jpg)
Tuesday, September 13, 2022
September 2022 Lori Whitlock Creative Team Blog Hop
Thursday, August 11, 2022
Crafty Tutorial with Lori's SVG's and Twine
Thursday, March 24, 2022
Lori Whitlock Bunny Head Box Tutorial

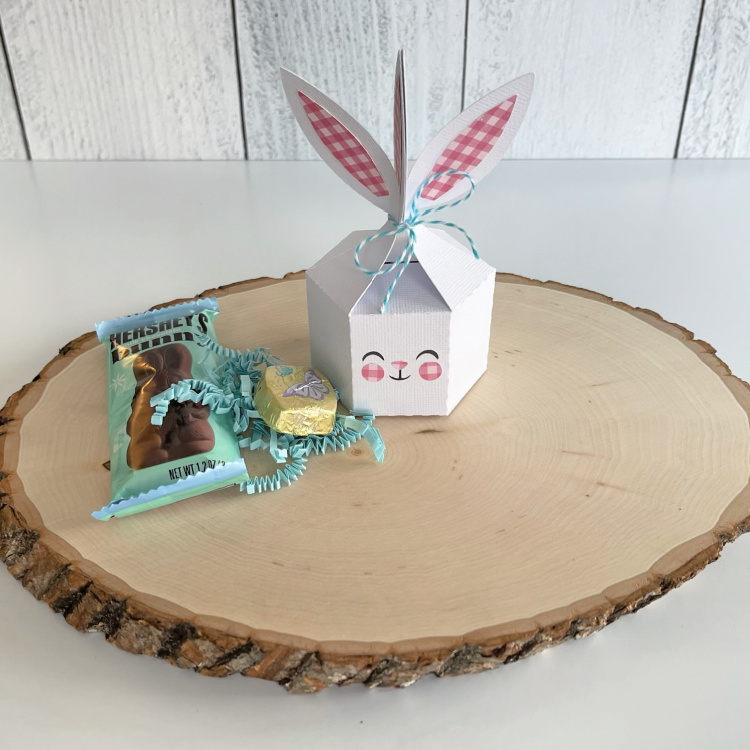
Anita here with a tutorial to make Lori's Bunny Head Box. You can find the files here (SVG, Silhouette). I used some of Lori's Echo Park Paper collections for this box including Wish Upon a Star and Celebrate Spring. I am going to make these to give to each person who comes for Easter dinner. They will look so cute on my table and will be filled with yummy sweets.
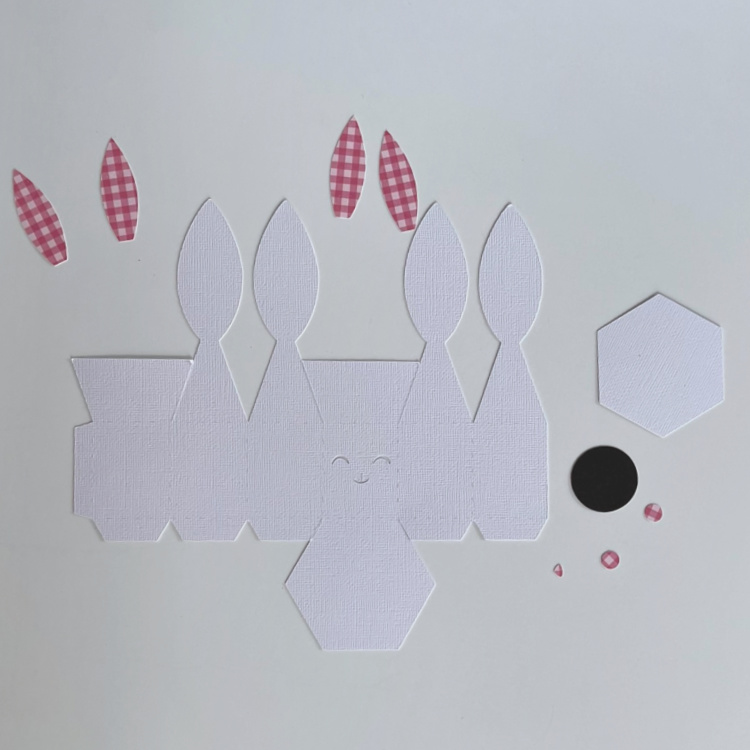
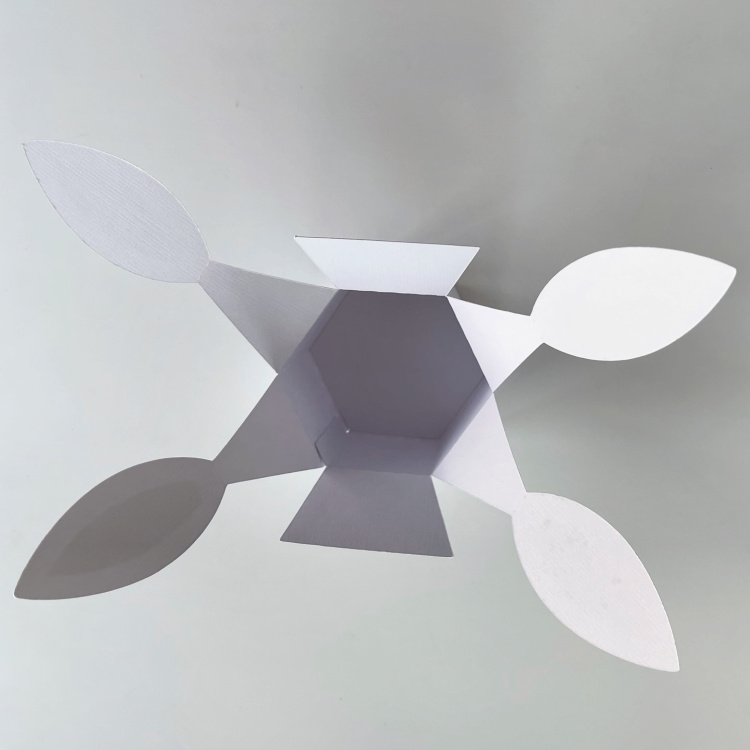
Here is a photo of the pieces that you need to cut out for this box.

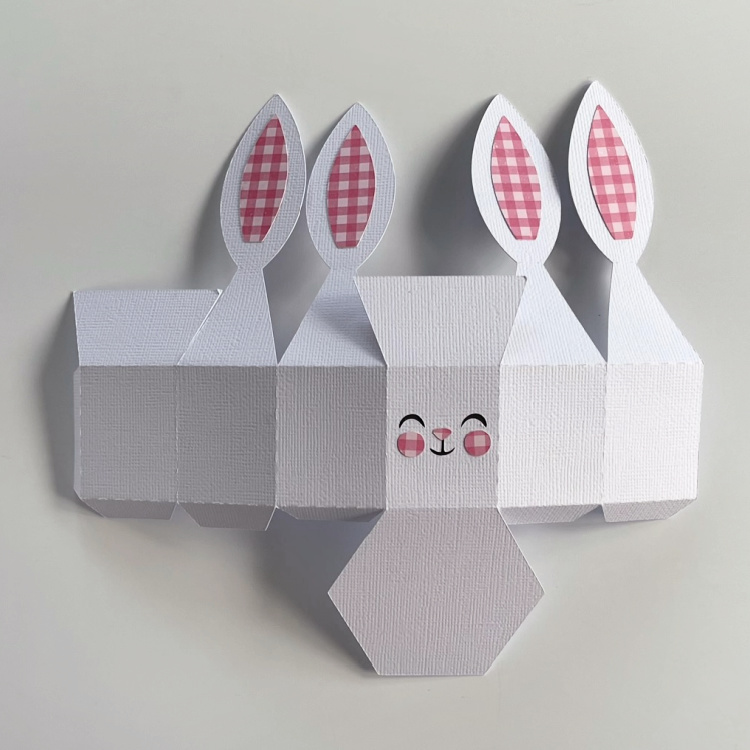
The next photo shows the face and ear pieces glued on as well as the direction the score lines need to be folded.

This photo shows the sides of the box glued together which was the first step in putting the box together.

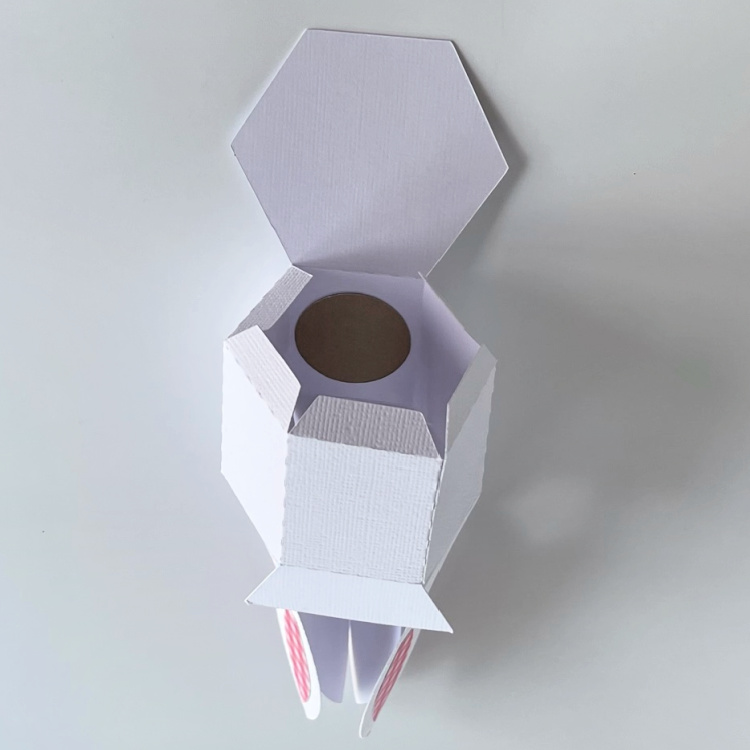
After the sides are glued together the insert hexagon piece gets glued in to cover up the tabs that were visible when you glued the sides to the bottom of the box.

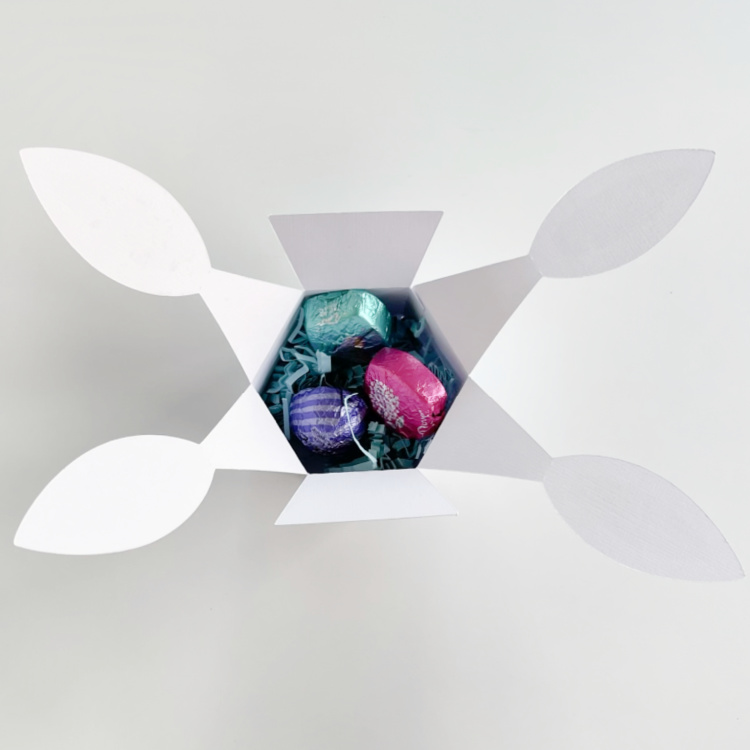
Lastly you can see how cute the box looks with a little Easter grass in it and some chocolate.

This went together quickly and easily. Hope that you have a chance to try this one out. Be sure to look at all of Lori's SVG files for your Spring celebration needs. That's it for me today.
Hugs,
Tuesday, March 8, 2022
Wiper Card St. Patrick's Boot Lori Whitlock March Creative Team Blog Hop
Welcome to the Lori Whitlock March Creative Team blog hop. You should have come here from Kathy’s blog and will next be going to Brandie’s blog. I made Lori's Wiper Card St. Patrick's Boot for this fun card. You can find the files here (SVG, Silhouette) Here is a tutorial that Lori made to help you with putting together these amazing cards. I used some of Lori's new Echo Park Paper collections called Birthday Boy.
Hope that your March is off to a great start. St. Patrick's Day is always a lot of fun and puts us that much closer to Spring.
Wednesday, March 2, 2022
Pop Up Box Card Birthday Age 60

Hello:
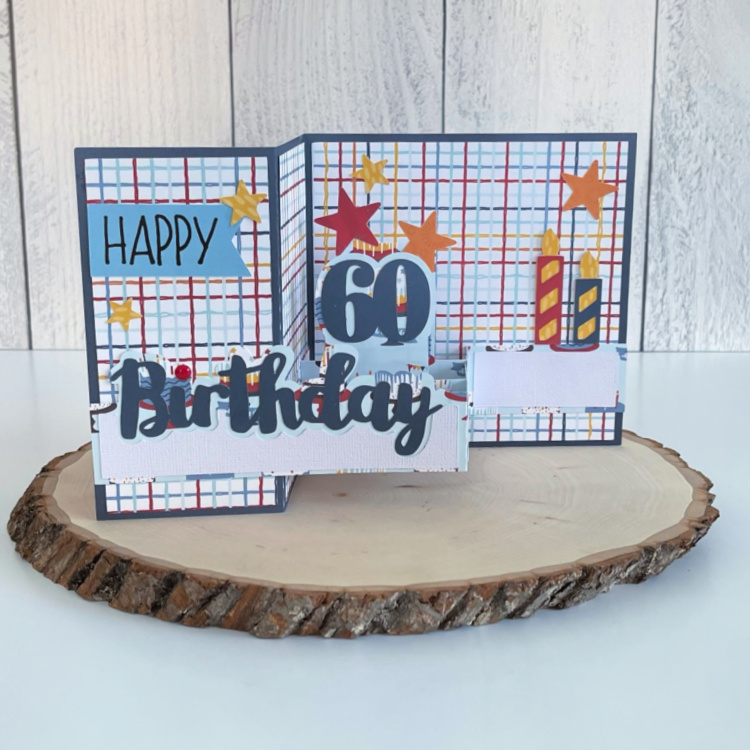
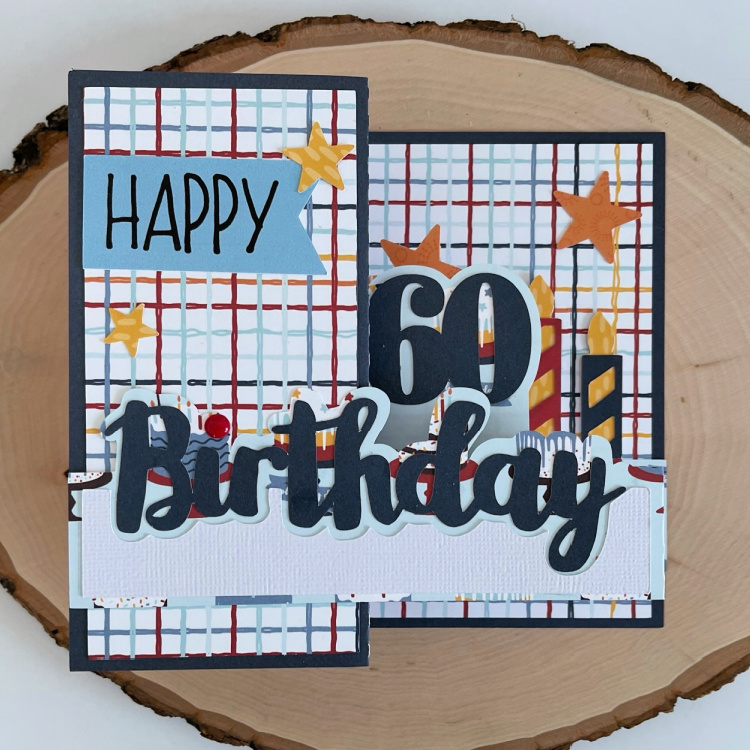
Anita here with a fun card that I made for a good friend who just turned 60. This card is so easy to put together and really makes a statement. It is called Pop Up Box Card Birthday and you can find it here (SVG, Silhouette) as well as here you can find Lori's tutorial for putting together her pop up box cards. I used one of Lori's new Echo Park Paper collections called Birthday Boy. She has many different ages to choose from for the wonderful card. Below is the card folded flat for mailing.

Have a great day.
Hugs,
Monday, October 25, 2021
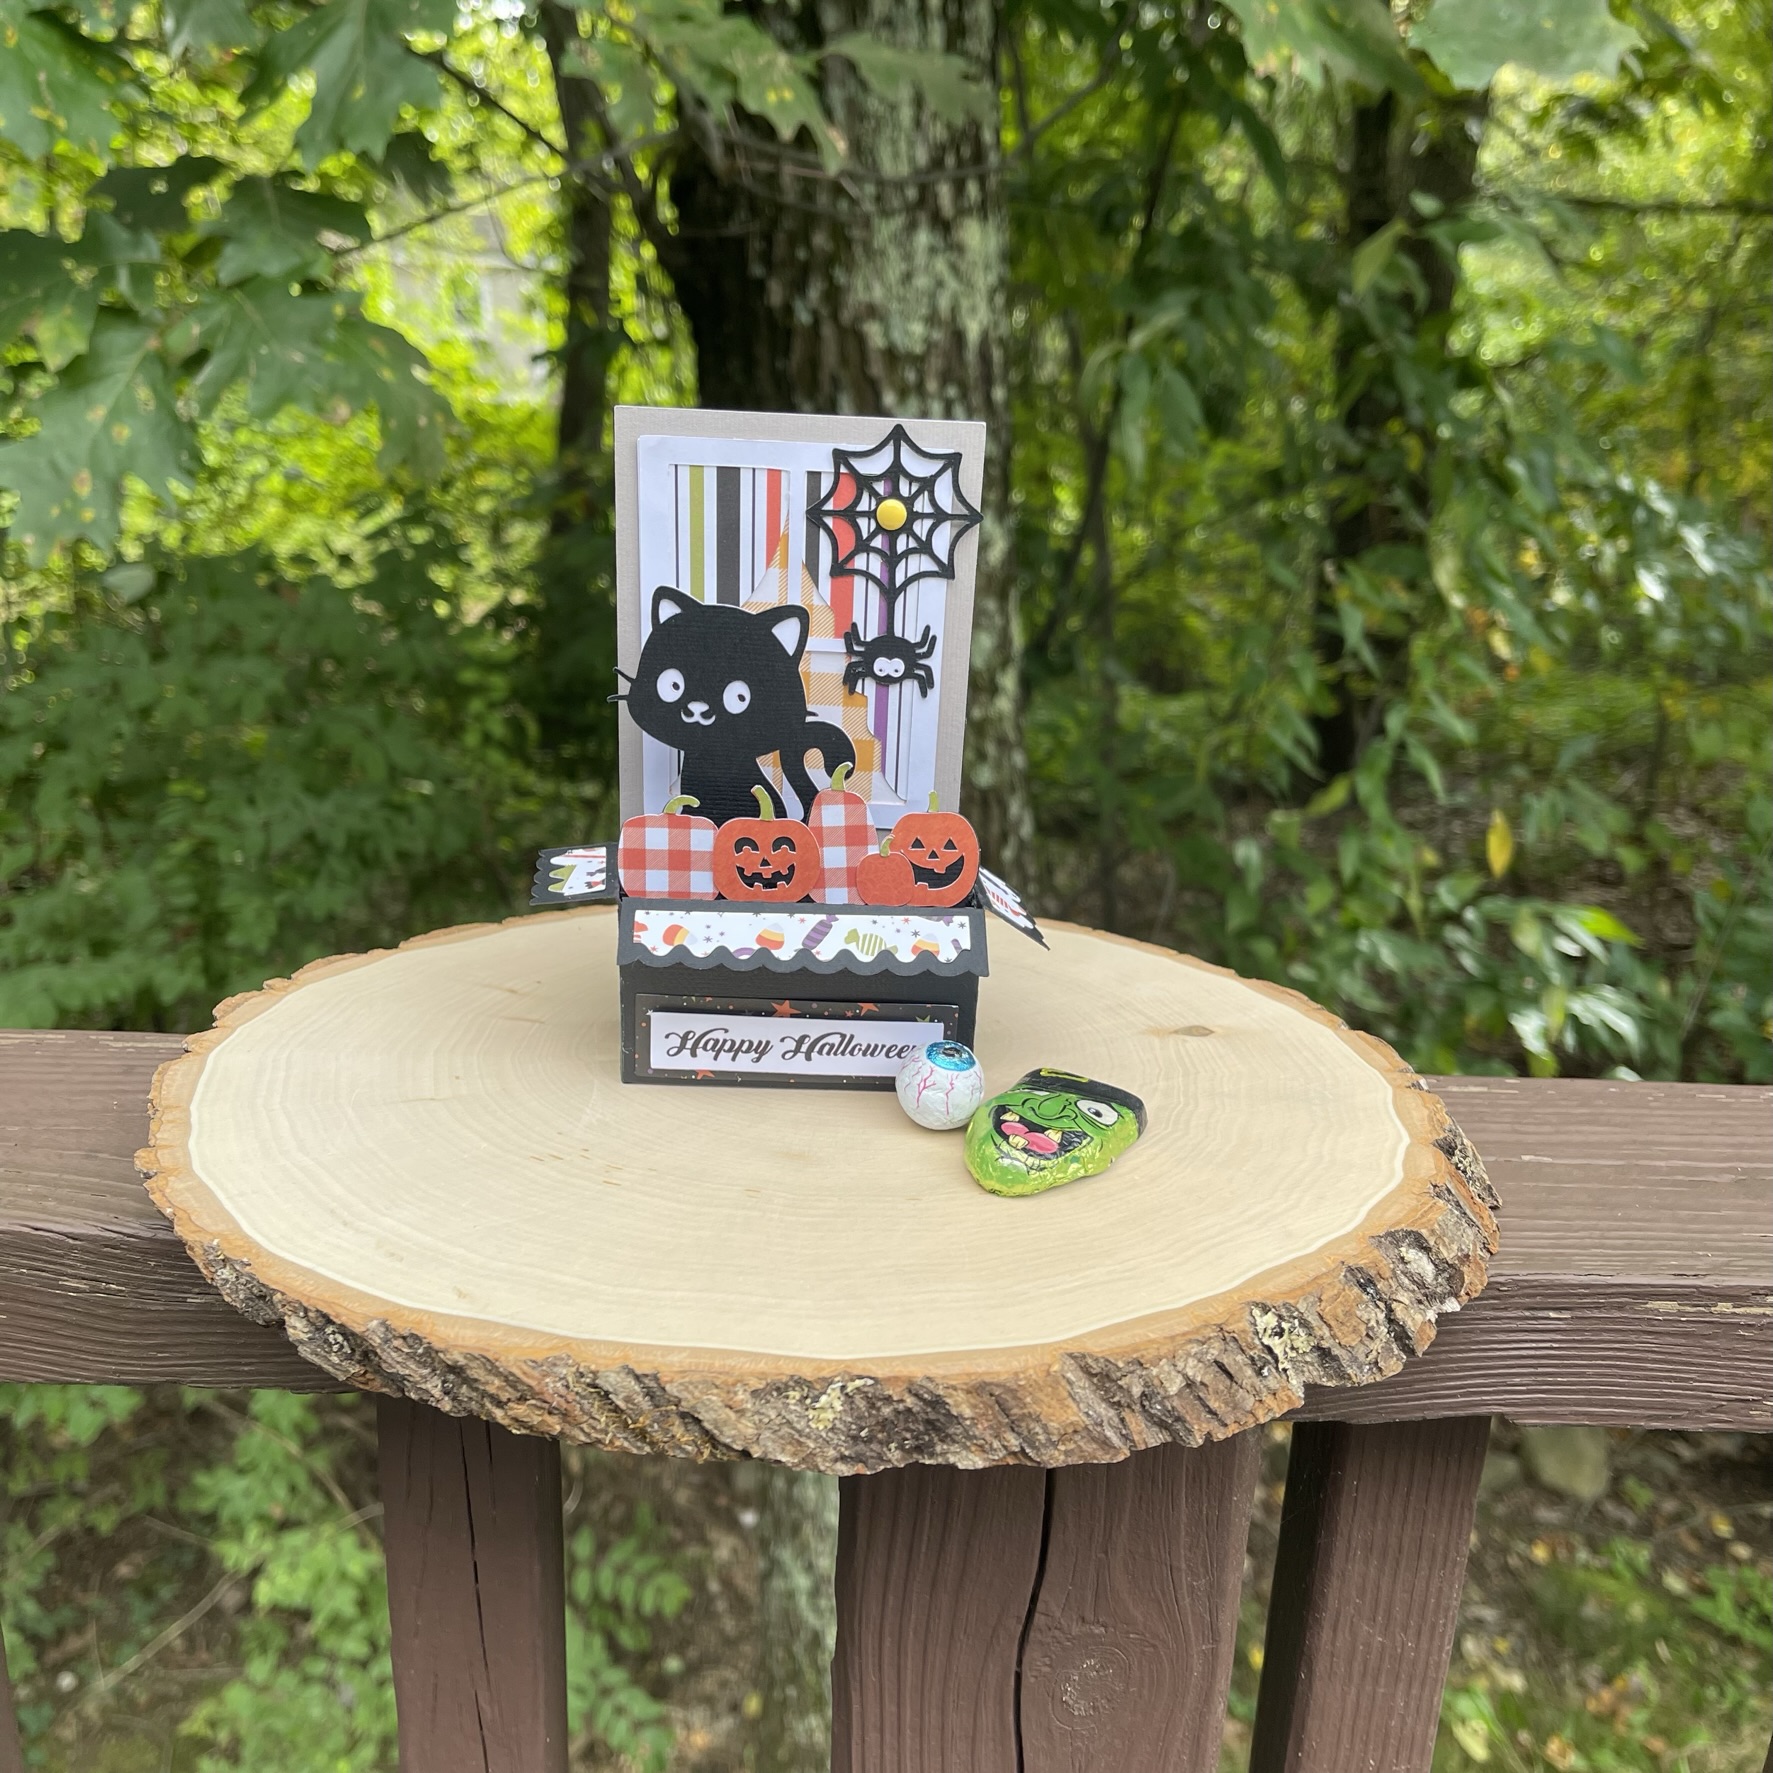
Halloween Box Card Window Black Cat
Hi Everyone:
Hope that everyone is having a great fall season. We are officially less than one week away from Halloween, so you still have time to create some fun cards and projects like this Box Card Window Black Cat (SVG, Silhouette) which is in Lori's store in addition to many other Halloween treat holders and decorative items. I used several of Lori's Echo Park Paper lines including I Love Halloween, A Perfect Autumn, and My Favorite Fall. I love making Lori's box cards as they are so easy to put together, really make a statement and fold flat for mailing. Here is a link to a tutorial from Lori in making the Box Card Window cards.
That's it for me today, have a great week and Happy Halloween.
Hugs,
Monday, August 23, 2021
Rectangle Pop Up Card Flower Box Stand
Anita here with one of Lori's new gorgeous Rectangle Pop Up Card Flower Stand. You can find that file here in Lori's store and here in the Silhouette store. Lori also has a tutorial which tells you how to put together her rectangle pop up card and you can find that here. I made this for a sweet young woman who is going after her dreams by starting a new job in a different field. I used several of Lori's Echo Park Paper collections, including My Favorite Christmas, A Perfect Autumn, Back to School, Celebrate Spring, Easter Wishes and Celebrate Easter. Be sure to check out all of Lori's new pop up stand cards, they are so cute and very easy to put together.
Hugs,
Thursday, July 22, 2021
Christmas in July Tea Towel Tutorial
Hi Everyone:
For the first time ever, I decided to start making some Christmas items in July. I made these tea towels using three of Lori's SVG files , Flourish Reindeer, which you can find here in her store and here in the Silhouette store, Mistletoe 2 which you can find here in Lori's store and here in the Silhouette store and Merry Christmas Flourish Tree which you can find here in Lori's store and here in the Silhouette store. I used some tea towel blanks from Kimberbell and they are of awesome quality. I tend to display my holiday tea towels hanging from my stove door handle so I planned out my sizing for the designs with that in mind. I used the Cricut Easy Press to adhere my iron on vinyl designs but you can also use a regular iron. They come out so beautiful and are so easy to work with.
Below are the photos of the parts to applique on the towels.
Here are the Tea Towels that I used.
Here are the close up photos of each towel.
I feel great to have gotten at least something done for the busy holiday season which will be upon us before we know it. Check out all of Lori's wonderful Christmas and holiday cut files and get a jump start on your holiday crafting.
Hugs,
Monday, June 21, 2021
4th of July Cookie Box
Anita here with a festive way to celebrate the 4th of July with cookies. I used Lori's SVG file called Cookie Box 4th of July which you can find here in her store and here in the Silhouette Design store. I also used a Doily file of hers to line the box for the cookie to sit on. You can find that file here in Lori's store and here in the Silhouette Design store. I used a piece of acetate for the window of my box and then also cut a circle the size of my cookie to lay in the box and to keep the doily and box free from grease. I also cut some cardstock 2 1/4" X 2 1/2" and then glued some twine down the middle of the paper. I then used a thin chopstick to roll the paper into a firecracker shape.
Here's the box with the doily out of it so you can see how it looks.
Finally, here is a photo of the box with the doily in it. Have a great day and thank you for looking.
Hugs,
Thursday, September 10, 2020
Mother's Day Hat Box Halloween Style
Happy Fall Everyone:
I fell in love with Lori's new Echo Park Paper collection called I Love Halloween and knew that I wanted to use it for a Halloween project for my tutorial. We are going to be making the Mother's Day Hat Box which you can find here in Lori's store and here in the Silhouette Design store. This is a fun and easy box to put together. Let me show you how I did it.
Here are the parts all cut out. I used my Silhouette Rotary Blade and followed a You Tube video to learn how to use it. It cut the felt beautifully for the flowers.
You are going to take your two long rectangle tabbed pieces and fold the tabs down.
Next you are going to glue the tabbed end of the rectangle piece to the other end making a circle.
The file comes with four round circles. One is glued inside the box and one is glued on top of the box. I like to glue my inside circle in first as I find it is easier to ease it to fit. Then I glue the top of the box on. I use a wet glue when making projects like this where I am asking the paper to be in different shapes.
I made both boxes and then checked to make sure that one slid easily over the top. I then chose that as my box top. I then glued the top on the box and the decorative band around the bottom.
I then glued the bottom of the box onto the scalloped piece centering it.
I brought the ends of the bow pieces on both sides to the center back of the bow and glued it together well. Then I wrapped the center bow piece around the bow and glued that as well.
I then added the ribbons of the bow to the back of the bow.
Here are my rolled felt flowers. I cut them easily with my Silhouette Cameo 4 following a You Tube video. I started at the end of the flower and rolled them up and secured them well with wet adhesive. Be sure that you don't put your flowers in the way of the box being able to be opened and closed easily. I added some embellishments to my box and rolled some of the leaves to give them a bit more dimension.
Lastly, here is the box open with some Halloween candy for your favorite sweetie. I have my hat out as a Halloween decoration and it makes me smile when I look at it.
That's it for me today. Be sure to check out all of Lori's Fall and Halloween SVG files and her new Echo Park Paper line called I love Halloween.
Hugs,


.jpg)


.jpg)
.jpg)