Showing posts with label Cricut. Show all posts

Thursday, May 18, 2023

Grad Cap Card Tutorial


Anita here with a tutorial for assembling Lori's A2 Grad Cap Card (SVGSilhouette).  I also used a tutorial that one of my fellow Creative Team Members created to make the tassel for my card.  You can find Teri's tutorial here.  Below are the pieces that you will need to cut out to make this card.

This is the card base and you will be closing the card by gluing on the tabs.
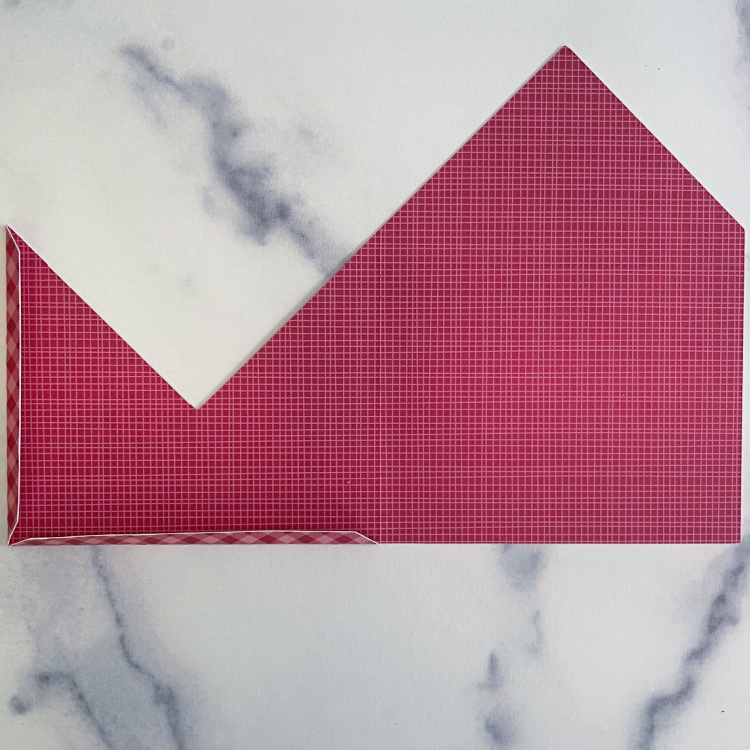
Next, we will fold the inner part of the card that makes the sentiment card base and grad hat shape.  You will want to flip your card over and fold across the score lines as shown below.
Flip the card back over with the right side facing up and fold on the diagonal score lines.  I did one fold to the left and then the next diagonal score line was folded to the right.

Once you have your card folded it should look like the card below.
I glued the tassel with a wet adhesive to make sure that it would stay in place.
Here is what the card insert looks like with the grad cap topper on the base and a brad through the holes.


Here is a photo of the pieces of the card pieces together and you are now ready to insert the card base into the envelope pocket.
That's it for me today.  Be sure to check out all of Lori's graduation cards.
Hugs,


Tuesday, March 8, 2022

Wiper Card St. Patrick's Boot Lori Whitlock March Creative Team Blog Hop


Welcome to the Lori Whitlock March Creative Team blog hop.  You should have come here from   Kathy’s blog and will next be going to Brandie’s blog. I made Lori's Wiper Card St. Patrick's Boot for this fun card.  You can find the files here (SVG, Silhouette)  Here is a tutorial that Lori made to help you with putting together these amazing cards.  I used some of Lori's new Echo Park Paper collections called Birthday Boy.

Hope that your March is off to a great start.  St. Patrick's Day is always a lot of fun and puts us that much closer to Spring.


Hugs,

Wednesday, March 2, 2022

Pop Up Box Card Birthday Age 60


Hello:

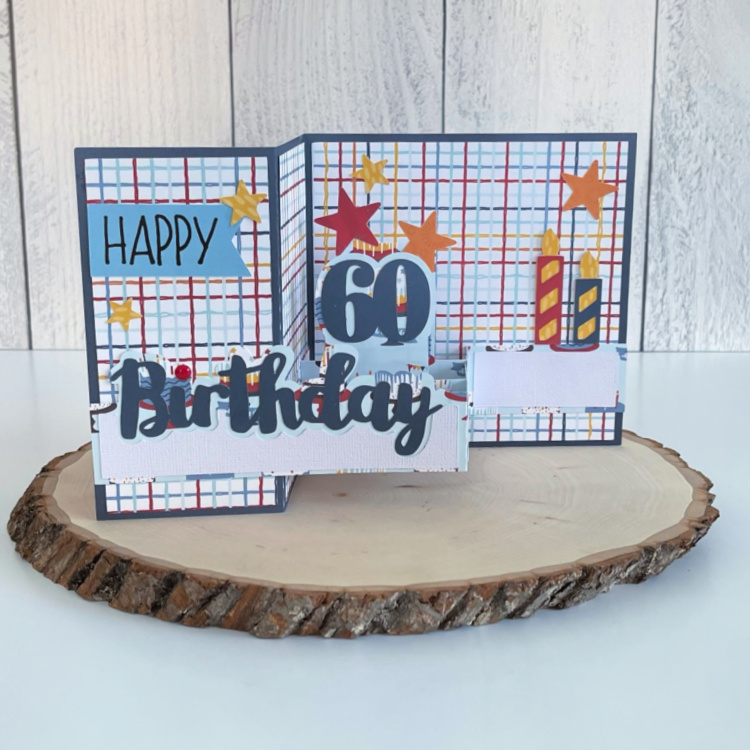
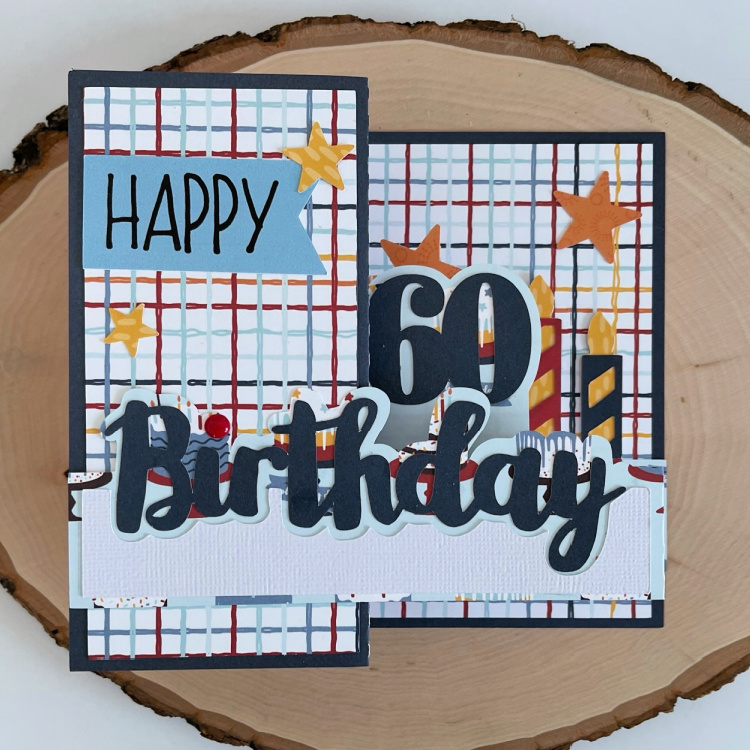
Anita here with a fun card that I made for a good friend who just turned 60.  This card is so easy to put together and really makes a statement.  It is called Pop Up Box Card Birthday and you can find it here (SVG, Silhouette) as well as here you can find Lori's tutorial for putting together her pop up box cards.  I used one of Lori's new Echo Park Paper collections called Birthday Boy.  She has many different ages to choose from for the wonderful card.  Below is the card folded flat for mailing. 

Have a great day.

Hugs, 

Thursday, July 22, 2021

Christmas in July Tea Towel Tutorial

 Hi Everyone:

For the first time ever, I decided to start making some Christmas items in July.  I  made these tea towels using three of Lori's SVG files , Flourish Reindeer, which you can find here in her store and here in the Silhouette store, Mistletoe 2 which you can find here in Lori's store and here in the Silhouette store and Merry Christmas Flourish Tree which you can find here in Lori's store and here in the Silhouette store.  I used some tea towel blanks from Kimberbell and they are of awesome quality.  I tend to display my holiday tea towels hanging from my stove door handle so I planned out my sizing for the designs with that in mind.  I used the Cricut Easy Press to adhere my iron on vinyl designs but you can also use a regular iron.  They come out so beautiful and are so easy to work with.

Below are the photos of the parts to applique on the towels.

Here are the Tea Towels that I used.

Here are the close up photos of each towel.

I feel great to have gotten at least something done for the busy holiday season which will be upon us before we know it.  Check out all of Lori's wonderful Christmas and holiday cut files and get a jump start on your holiday crafting.

Hugs,

Tuesday, May 12, 2020

May Lori Whitlock Blog Hop

 
Hi Everyone:

Happy May.  Welcome to the Lori Whitlock Creative Team May Blog Hop.  You should have come here from Kathy Skou's blog and will next be going to  Brandie Harding Adams' blog.  If you didn't arrive here in that way, you can always start at the beginning at Lori's blog, you don't want to miss all the pretty things my team mates have made.  I made Lori's new Double Slider Card Birthday Dog which you can find here in her store and here in the Silhouette Design store.  Lori also has a wonderful tutorial on her blog and on You Tube which you can find here.  I used some Doodlebug Petite Prints for this card.  It is for a sweet woman who has a black and white dog.

These photos show the card closed, ready to be mailed off; the second photo shows it with the pull tab extended and the third shows the inside of the card.


That's it for me today.  Thanks for looking and have a great day.
Hugs,

Tuesday, December 10, 2019

December Lori Whitlock Blog Hop


Anita here with the next stop on the blog hop. You should have come here from Kathy Skou's blog and next will be going to Brandie Harding Adams' blog.  If you did not get here in that way then you can start at the beginning at Lori's blog.  I used some Vinyl and Lori's font called Matilda which you can find here in her store and here in the Silhouette store.  I bought the new Cricut Easy Press and have been making lots of onesies for my new grandbaby boy who is due to make his appearance in May.  Lori has many different fonts and designs that you can use to decorate gifts for your loves ones.


Hugs, 

Thursday, January 19, 2017

Valentine Gift Bag and Goodies

Hi:
Anita here with an easy and fun Valentine project that I created for my husband.  My daughter bought some items on Etsy and they came in this awesome cotton bag which I just knew I needed to repurpose.  
Here are the materials that I used for my project in addition to some twine.  I used Printable Fabric from Cricut which is adhesive back and very easy to use.
I used two different files for this project.  The Valentine's above are from a file called 3 Valentine's Cards and you can find them here in the Silhouette Store.  I also used 2 Doily Hearts which you can find here in Lori's SVG Store and here in the Silhouette Store.  I love using the print and cut feature because you are able to print exactly what you see and then cut it out perfectly.  Don't forget to add  your registration marks to your mat before you print so your machine will know where the cut lines are.
Make sure to position your printed cotton canvas fabric in the top left hand corner of your mat as you can see from the photo above.
Here is what mine look like after they are cut out.  My printer was a little wonky and made some lines in the canvas.  I would suggest printing one on paper as a sample before putting in your canvas.
After I cut out the Doily Hearts I ran them through my Xyron to put strong adhesive on the back.  I wanted to make sure that they would adhere to the bag and stay in place once it was filled.
I wanted to add some twine to the string that was already in the bag.  I threaded the three colored pieces of twine through the same hole to match the embellishments on my bag.
Before I stuck everything down well I pulled the strings tight on the bag to see how the hearts and Valentine card would lay.
Lastly here is a photo of the completed bag with the sugar cookies that I made for my Valentine. I know that he will love them.  Hope you are inspired to start working on some Valentine's for the loved one's in  your life and that you will check out all of Lori's wonderful cut files for what is one of my favorite holidays.
Hugs,
Anita

Thursday, November 10, 2016

Glittery Car Monogram Tutorial

Hi!  Anita here with a tutorial to make your own car window monogram. This is for my daughter's car and she loves anything that is monogrammed.  I previously purchased one and it came off in the car wash.    I used Lori's Monogram Set A-Z which is a lovely file set with so many different options for your personalization needs.  You can find this file here in Lori's store and they are sold as individual letters in the Silhouette store.  Here is the Mhere is the C and the L.
There are a few supplies that you will need for your project.  You will need some kind of vinyl and transfer tape.   I chose some glitter vinyl from Cricut.  You will also need a brayer, a craft stick or scraper and a weeding tool, or pick.
Open all three files on your mat, they will likely overlap but you can move them around.
Ungroup your monogram files one set at a time.  Move the three initial groups that you want to use onto your mat.
Ungroup the desired monogram files from the remaining files and leave them on your mat.  I am using  CLM.
I  decided that I wanted to use a round monogram so I kept that file on my mat.  The other files were off to the left and messy so you can highlight them all and delete them.
I made the circle and monogram large so that I could get the placement that I wanted within the circle.  I  measured the space on her rear window which would allow for the monogram to be positioned so that the rear wiper would not touch it when in use.
I resized it to fit her window.
When you put the vinyl on your mat,  you want to use a brayer or a pizza roller to make sure that the vinyl is stuck to the mat well and will not move.
Next, select the vinyl setting for cutting on your machine and adjust your blade.  This is very important because you want it to make what is called a kiss cut which is essentially to cut through the vinyl but not the backing.  This will make more sense as we move forward.
Once your design is cut, you need to weed out the pieces of vinyl that you do not want to have in your final design.
After weeding,  cut the backing with your design on it so that you have at least 1/2" clearance on all sides.  Cut a piece of the transfer tape to the same size or slightly bigger dimension than your design piece.  Remove the liner from the transfer tape piece and gently place it over your cut image.   Use a scraper to burnish the transfer tape onto the vinyl.
Now you might be wondering why my sample above is pink and my actual monogram that I put on the window is silver. Well, things don't always work out and you might have to start again.  I worked hard at trying to burnish the pink monogram and just believe that the vinyl was old and the design was a bit intricate so it just did not work.  I moved on to plan B and it worked like a charm.
Peel the backing paper from the design,  leaving the transfer tape, with your design, sticky and exposed.  Be sure to clean the window first and then put the transfer tape with the vinyl images onto the window.  Use your scraper to make sure that it is burnished to the window.
Pull back a tiny piece of the transfer tape to make sure that the letters are sticking.  When you know they set, pull the whole piece of tape off at a 45 degree angle, slowly and carefully.  I'm so happy with this design!  I'm sure my daughter will love it!
Happy monograming.  You can monogram so many things, from clothing, to home goods, to a car window.  Lori has so many adorable files that would look so awesome in vinyl on a surface of your choice.
Hugs,