Tuesday, March 31, 2015

Kaisercraft Design Team 2015 Entry

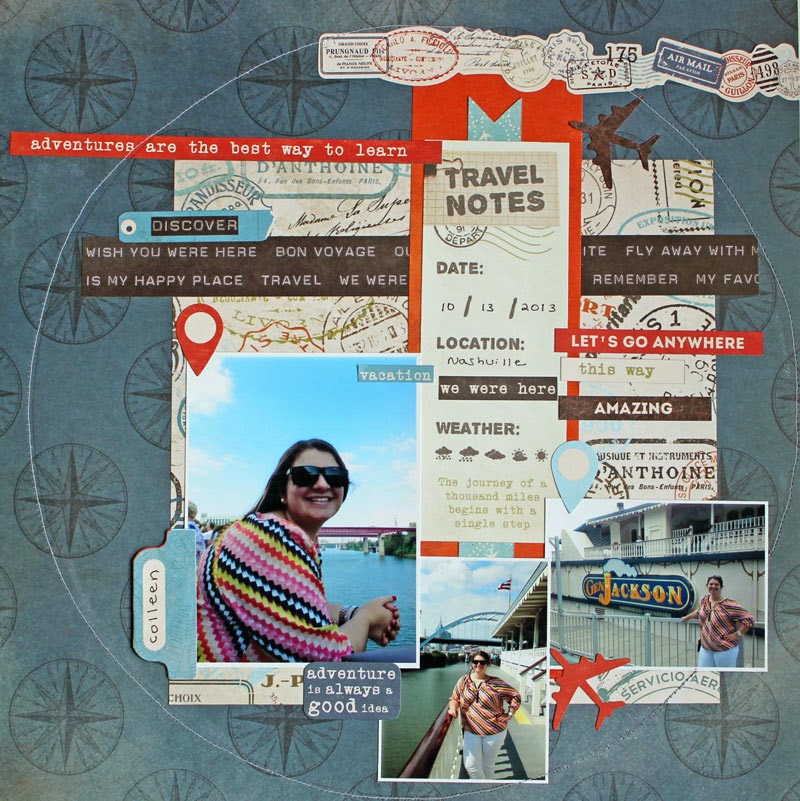
I had a great time creating this layout of my beautiful daughter using Wanderlust by Kaisercraft.  The papers and embellishments are wonderful to work with and were a perfect match for the photos from our trip to Nashville.

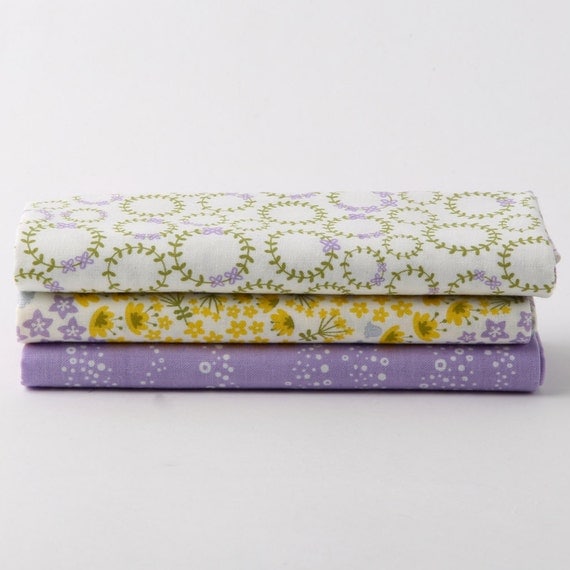
Here are some close ups so that you can see the embellishments that come in the paper pack.  
This is probably the most fun I have had making an altered item in a long time.  I used a chalk board and decorated it with Kaisercraft's Shine Bright collection.  These are engagement photos of my son and his fiance.  I am hosting a dessert buffet before the wedding for out of town guests and I have a chalk board theme so this worked perfectly.  The embellishments that come with this kit are fabulous.
Here is a close up view of some of the stickers that are in the paper pack.
Lastly, I created a vintage inspired card using Betsy's Couture by Kaisercraft.  This paper line is fabulous.  I used the 6X6 paper pad which has the embossed papers which you can see above and the Collectables pack as well.  I am going to tuck this card away into my stash for a special person.
Thanks for looking and be sure to check out these lines and many other fabulous one's from Kaisercraft.
 
Project Materials:
Kaisercraft Collections:  Wanderlust, Shine Bright and Betsy's Couture, Betsy's Couture Collectables
Chalk Board
Sequins by Doodlebug
Sakura Gel Pen
Sewing Machine
Hugs,


Friday, March 27, 2015

The Most Wonderful Time of the Year

Sharing my DT card for this week's challenge at CASE-ing Christmas.  Below is the card that I was working from, my fellow teammie Judy made this gorgeous card.  It makes me think of paint chips with a little bling.

Judy's Original Card
Be sure to check out the challenge at CASE-ing Christmas.
Hugs,


Wednesday, March 25, 2015

Inspire Me CardMaker

Mason Jar Flower Arrangement | VIBEKE DESIGN We have beautiful arrangements like these on bloomnation.com!

We have had a really rough winter here in MA and I was inspired by this gorgeous arrangement of flowers from Pinterest to create this card.  I am in love with these word wood chips from Freckled Fawn.  This card was so easy to create using dies from Memory Box and My Favorite Things.
This side view shows the dimension on my flower as I popped up the green layer and pink center.  Spring is around the corner and I can't wait.
Supplies Used:
Memory Box Die Joyful Bouquet #98856
My Favorite Things Die Plentiful Petals
Lawn Fawn Petite Paper Pack #LF818
Freckled Fawn Word Wood Chips
Teresa Collins Wood/Cork Dots
Doodlebug Sprinkles
Twine from personal stash
Hugs,

Friday, March 20, 2015

Squarely Quilted


I am so in love with these new fabrics from Love My Fabrics.  I whipped up this quick quilt in a weekend using this gorgeous grey, navy and bright yellow coordinating fabric. The pattern is called Little P Though the Looking Glass by It's Sew Emma.   Be sure to check out the Love My Fabrics store and sister Love My Tapes store on Etsy.  The quilting was done by Quilts Everlasting.  Debbie is fabulous and does such a wonderful job.  Use my name if you send anything her way to be quilted.
Hugs,

Monday, March 16, 2015

Hello Friend CardMaker Magazine and Sakura Blog Hop

Hello Everyone:
Happy Monday.  We are starting off this week with a really fun blog hop with my fellow DT members from CardMaker Magazine Blog and Sakura.  We were lucky enough to receive some wonderful products from Sakura which I used on the card above.

I used a Memory Box Die called Verona Bouquet which was perfect for outlining with the Sakura Gelly Roll Classic White Pen.  This pen is so smooth when you work with it and dries very quickly so you don't have to worry about smudging it.  

The Quickie Glue Pen is one of my favorites and is perfect for gluing down delicate pieces of paper.  I always have a stash of them on hand for these types of projects.  If you didn't come to my blog as part of the hop you are going to want to go to the CardMaker Magazine blog and start hopping there.  You should have come to my blog from the very talented Lisa Lahiff's blog and next you will be going to the amazing AJ Otto's blog.  I have also included the whole hop list below for ease of hopping.  


Here’s the blog hop list:
CardMaker: http://www.cardmakermagazine.com/blog/ < < - - - - Start hopping here
Anita Mulcahey: http://happypapercrafthappenings.blogspot.com/ < < - - - - You are here
*AJ Otto: http://thewillowgarden.blogspot.com/ < < - - - - You are going here next

Project Materials:
Sakura of America White Classic Gelly Roll Pen, Quickie Glue Pen
Bazzill Cardstock
Memento Ink, Grape Jelly
Sizzix, Big Kick

Hugs,

Friday, March 13, 2015

Warm Winter Wishes

Hello, friends!  Welcome to CASE-ing Christmas!  We are a weekly challenge devoted to the holiday season--year round! ;)  How does this challenge work?  It's easy!  We give you a card to CASE and you CASE it!

If you've never CASEd a card, here's what you need to do:

  1. Look at the CASE card photo.
  2. Be inspired by some element of the card.  This could be colors, layout, image, etc.
  3. Make a card based on that inspiration.
See!  Easy peasy!  We cannot wait to see what you have for us this week and each week this year! Are you ready for the next CASE card?!  

Here it is ... 
Card by DT member Anita
So I am CASE-ing my own card for this challenge.  I stuck with the shape, bling and glitter paper.  What will you make of my card?  I can't wait to see what you make, please share it here.  My dear friend Kathy Skou created the Silhouette cut file, Hip to be Square, which you can download for free in the Paper Issues store.

Hugs,

Thursday, March 12, 2015

Love This Smile


Hi Everyone:
Anita here with a layout that I made using the March sketch from Paper Issues.  I was going through some photos and found this photo from Sean's year in Kindergarten.  He loved to dress up and was stylin' even back then.


Products:
Heidi Swapp Monthly Planner Paper Pad - Hello Beautiful which you can find in the Paper Issues Store
Dear Lizzy Thickers Royal
Heidi Swapp Flag Clips,
Paper Issues SWAG Bag - February
Freckled Fawn Word Wood Chips
Panda Eight Flair
Lawn Fawn Flair
My Favorite Things Dies
Bazzill Cardstock
Doodlebug Raised Hearts Vellum
 Lovebugs Red Hearts 12x12 Vellum-Doodlebug Sprinkles
Don't forget to use the code Nita to save 20%.  See you soon.


Hugs,


Tuesday, March 10, 2015

Love My Fabrics Hexi Pillow

I am so excited to share my first post for the Love My Fabric store using their lovely fabric.  I made this pillow for Mother's Day for my mother.  I had fun making piping which I hadn't done in a really long time.  I used the Louise Garden Quilt Pattern for the pillow and the instructions and template are fabulous.

Wildflower Fat Quarter Bundle
Cotton Fabric - Wildflower- Fat quarter bundle


This fat quarter bundle comes pre-designed with hand-selected coordinating fabrics that are very cute and flattering together. Each fabric in the bundle complements the other in a very eye-appealing way. 
Here are some close-ups of my pillow.

I took some photos for you of how I made my piping.  It is a great accent to so many projects.  Here are the steps that I followed:
1.  Determine the width of your bias by taking your cording size and multiplying it by two.  Then multiply the seam allowance .25 by two and add those together.  I had 1/2" cording so I multiplied (2 X .5) + (2 X .5) = 2 inch wide bias strips.
2.  Next to find the length of piping you will need double the pillow's width and length and then add an additional 4 inches.  Mine was 17" square so my formula looked like this (2 X 17) + (2 X 17) +4 =72 inches.  So I needed at least 72 inches of 2" wide bias strips.
3.  Fold the bottom left corner of your fabric up to and matching the top edge.  The fold that this makes is your bias and you are going to want to mark that line with a removable marker.
4.  You will then take your ruler and draw lines on either side of the main line two inches apart until you have enough length for the measurement from above.
5.  Your ends will have an angle to them and you need to trim them up.
6.  You will then need to match up your strips as shown below and draw a line down from the left corner as this will be your stitching line.
Once they are all sewn together you will have one long strip of bias tape that is ready to use however you want.
Hope you have found this helpful and have a great day.  Be sure to click on the link for the store and check out all the wonderful fabric.
Hugs,


Monday, March 9, 2015

Celebrate & Decorate CardMaker Magazine post


The theme for this post for CardMaker Magazine's blog is Celebrate and Decorate.  What better event to celebrate than St. Patrick's Day.  I am Irish and did Irish step dancing when I was growing up and love this holiday.  It also helps to know that spring is just around the corner.  I used Silhouette cut files to make all the parts for my celebration purse.
The purse is a Samantha Walker cut file and I have made several of these in the past.  She has so many different purse styles in the Silhouette store.  I used Doodlebug's Happy Go Lucky new line.  I was thrilled to see that they had come out with a St. Patrick's Day line.
Here is a close up of the tag on the purse.  I popped up the top layer and used both twine and ribbon to secure it to the purse.
Isn't this pinwheel so cute.  It makes me think of spring and so happy to look at it.  I have a stash of these paper straws and this was a perfect project to use one on.
There are so many different patterns in the Silhouette store for this holiday.  I used the print and cut feature on my Silhouette to make this pillow box and then filled it with candy kisses with the adorable clover kisses cut and print file.
Lastly, how fun are these.  They are St. Patrick's Day Candy Bar Wrappers and us the print and cut feature on the Silhouette as well.
To use the print and cut function, your file must be a print and cut one.  Open the file on your Silhouette and click on the button which is highlighted on the top icon panel which is the 4th button from the right and says Registration Marks.  Click on the Type of Silhouette that you have and the marks that are on the screen shot will appear above.  Resize your paper to 8 1/2 X 11 and then click the print icon on the icon panel.  Once it is printed, line it up carefully on your mat and press cut.  Your Silhouette will scan the registration marks first prior to cutting.

Project Materials:
Clover Kisses, Amy Robison #37780
Clover Pillow Box, Amy Robison #38441
St. Patrick's Day Candy Wrappers, Amy Robison #56371
Doodlebug Patterned Papers, Happy Go Lucky
Stampin' Up Cardstock
May Arts Ribbon
Paper Straw

Hugs,

Anita


Pinspire Me With Paper Issues

I had such fun playing along with Paper Issues Pinspire me Monday for March.  You can check out the Paper Issues blog here and play along for a chance at one of two lovely prizes.
I fell in love with this wreath pattern from The Digi Play Ground and found a tag that I thought would work well with it as well.  The link to the cut files can be found below.  I used some brand new Doodlebug papers called Happy-Go-Lucky.  I am married to an Irish man so will love hanging this in my home.


I liked my wreath fuller so I made more of each of the patterned paper shamrocks.  I wanted the sentiment tag to match the papers so I put it with the shamrocks that were going to be the same papers as you can see below.


I have included screen shots of the original tag size and then showing how I made it smaller to fit on the wreath.  It is important to not un-group the files until after you have re-sized them or they will not fit together as they are supposed to.


Digi Playground Store
3D Clover Wreath by Jamie Cripps
St. Patrick's Day Cuttables by Jamie Cripps
Well that's all for now.  Enjoy the rest of your week and be sure to link up at Paper Issues as we would love to see what you make.  You can also share your project at the Digi Playground as well.
Hugs,

Monday, March 2, 2015

Paper Issues Enamored with Enamel Issue

Hey Everyone:
This is my first Issue post with Paper Issues and I had a lot of fun working with this lovely kit from Paper Camelia  January Everyday Life and Add-On Kits with lots of gorgeous papers and really fun embellishments.  Below are all the links for Paper Camelia's store, Facebook, etc.

Prize: March Main Kit